|
|
| MOQ: | 1 |
| Standard Packaging: | safety carton pack or plywood box |
| Delivery Period: | 30 days |
| Payment Method: | T/T |
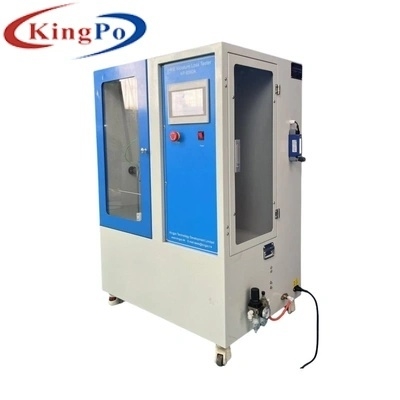
1. Overview:
The HME testing equipment is developed and designed according to ISO 9360-1 and ISO 23328-1. This equipment is mainly used to test the performance of the heat and moisture exchanger that simulates the human body, mainly measuring the water loss value during the use of the HME.
2. Specifications:
3. Equipment control and operation:
![]()
① 2-liter anesthesia bag
② Postpartum dampness patient model
③ Control system
④ Flow meter (ISO9360 test)
3.1. Front page
You can choose Chinese or English on the homepage. Click the [Enter System] button to open the running interface.
![]()
3.2. Run interface
![]()
1. Heating switch: ON, the heater starts heating, PID control, OFF turns off heating;
2. Humidity PV: humidity value in the water tank;
3. Water tank temperature SV: set the water tank temperature;
4. Water tank temperature PV: real-time display value of water tank temperature;
5. Box temperature SV: set the box temperature;
6. Box temperature PV: real-time display value of box temperature;
7. Time setting: set the breathing operation time, and it will stop automatically when the time is up;
8. Time display: display breathing running time;
9. [TIMER] button: white, timer stop, yellow, timer start;
10. Breathing volume: Click the input box to select 1000ml, 750ml, 500ml, 250ml;
11. Respiratory frequency: automatically selected after selecting respiratory volume;
12. [Breathing Start] button: start breathing after selecting the breathing volume;
13. [Return to origin] button: After the device is powered on, it will return to the origin before starting breathing;
14. Current weight: When weighing, it displays the weight of the breathing device, which is used to calculate the loss of water during breathing;
15. [Reset] button: used to clear the scale before weighing, so that the current weight is zero;
16. [Record Clear] button: clear the recorded weight value;
17. [Weight] button: used for weighing;
18. [Record] button: used to record the weight during weighing;
4. Test steps:
(1) Open the water inlet on the sink and fill the sink with water to the standard water level (119-143mm).
![]()
(2) Connect the external power supply and turn the power switch to the "open" position.
(3) Connect the test sample to the port on the right side of the device.
(4) Set the heating temperature to 37°C. Click the water tank and box heating button to start heating, and wait for the temperature to stabilize for at least 1 hour.
(5) Set the test time to 25±1H
(6) Set up a test Tidal volume and start it.
![]()
(7) The device stops automatically when the test time is reached
5. Notes:
6. Common troubleshooting
|
Serial number |
Fault phenomenon |
Cause of failure |
Treatment method |
|
1 |
The touch screen does not light up when the power switch is turned on |
External power supply is not working |
Reconnect the power supply |
|
The device circuit breaker is disconnected |
Close the circuit breaker |
||
|
2 |
Pressing the start button does nothing |
The test time is not reset |
Reset the time to zero |
|
Emergency stop switch not reset |
Reset the emergency stop switch |
||
|
3 |
Large temperature fluctuations |
Thermocouple Connection Problems |
Reconnect the thermocouple plug |
|
4 |
Unstable weighing |
Other items touch HG |
Remove the left and right pipes inside the box |

|
|
| MOQ: | 1 |
| Standard Packaging: | safety carton pack or plywood box |
| Delivery Period: | 30 days |
| Payment Method: | T/T |
1. Overview:
The HME testing equipment is developed and designed according to ISO 9360-1 and ISO 23328-1. This equipment is mainly used to test the performance of the heat and moisture exchanger that simulates the human body, mainly measuring the water loss value during the use of the HME.
2. Specifications:
3. Equipment control and operation:
![]()
① 2-liter anesthesia bag
② Postpartum dampness patient model
③ Control system
④ Flow meter (ISO9360 test)
3.1. Front page
You can choose Chinese or English on the homepage. Click the [Enter System] button to open the running interface.
![]()
3.2. Run interface
![]()
1. Heating switch: ON, the heater starts heating, PID control, OFF turns off heating;
2. Humidity PV: humidity value in the water tank;
3. Water tank temperature SV: set the water tank temperature;
4. Water tank temperature PV: real-time display value of water tank temperature;
5. Box temperature SV: set the box temperature;
6. Box temperature PV: real-time display value of box temperature;
7. Time setting: set the breathing operation time, and it will stop automatically when the time is up;
8. Time display: display breathing running time;
9. [TIMER] button: white, timer stop, yellow, timer start;
10. Breathing volume: Click the input box to select 1000ml, 750ml, 500ml, 250ml;
11. Respiratory frequency: automatically selected after selecting respiratory volume;
12. [Breathing Start] button: start breathing after selecting the breathing volume;
13. [Return to origin] button: After the device is powered on, it will return to the origin before starting breathing;
14. Current weight: When weighing, it displays the weight of the breathing device, which is used to calculate the loss of water during breathing;
15. [Reset] button: used to clear the scale before weighing, so that the current weight is zero;
16. [Record Clear] button: clear the recorded weight value;
17. [Weight] button: used for weighing;
18. [Record] button: used to record the weight during weighing;
4. Test steps:
(1) Open the water inlet on the sink and fill the sink with water to the standard water level (119-143mm).
![]()
(2) Connect the external power supply and turn the power switch to the "open" position.
(3) Connect the test sample to the port on the right side of the device.
(4) Set the heating temperature to 37°C. Click the water tank and box heating button to start heating, and wait for the temperature to stabilize for at least 1 hour.
(5) Set the test time to 25±1H
(6) Set up a test Tidal volume and start it.
![]()
(7) The device stops automatically when the test time is reached
5. Notes:
6. Common troubleshooting
|
Serial number |
Fault phenomenon |
Cause of failure |
Treatment method |
|
1 |
The touch screen does not light up when the power switch is turned on |
External power supply is not working |
Reconnect the power supply |
|
The device circuit breaker is disconnected |
Close the circuit breaker |
||
|
2 |
Pressing the start button does nothing |
The test time is not reset |
Reset the time to zero |
|
Emergency stop switch not reset |
Reset the emergency stop switch |
||
|
3 |
Large temperature fluctuations |
Thermocouple Connection Problems |
Reconnect the thermocouple plug |
|
4 |
Unstable weighing |
Other items touch HG |
Remove the left and right pipes inside the box |
address
RM C, 13/F, HARVARD COMMERCIAL BUILDING, 105-111 THOMSON ROAD, WAN CHAI, HK
tel
86-769- 81627526